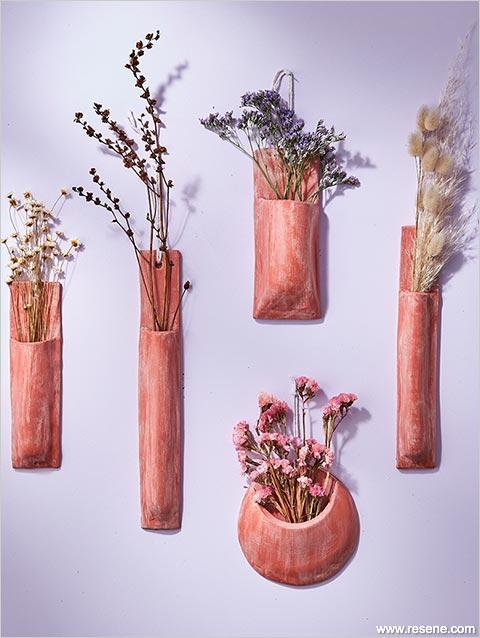
DIY – Terracotta Bud Vases
Take on the terracotta trend and sculpt a unique floral feature.
You will need:
- Modelling clay (air-drying or baking)
- Rolling pin
- Knife
- Straw
- Fine sandpaper
- Test pot brush
- Paint test pots (we like Resene Sakura & Resene Apple Blossom)
- Resene FX Paint Effects Medium
- Small sponge
- Cord to hang
Step one: Start by rolling out your clay about 7mm thick (A). It’s important to work on a clean, non-stick surface.
Step two: Use a knife to cut a rectangle as long as you want the main shape to be, then cut a square roughly twice the width of the rectangle and two-thirds the height (B). No matter what shape you’re making, the top piece must be wider to form a dome or pocket. The backing piece always needs to be taller and have enough height to support your flora and allow for a hole.
Step three: If using air-drying clay, dip your fingers in water and wet the edges of the clay slightly – baking clay does not require any water to seal together. Take the smaller, wider square piece and make an arc over the backing piece, bringing the sides together (C). Press the sides down so the clay bonds together, then do the same along the bottom (D), making sure you still have a curved opening at the top.
Keep reading: www.curtainclean.co.nz...

Best way to use leftovers?
I'm sure you've got some excess ham at home or cold roast potatoes.
What are some of your favourite ways to use leftover food from Christmas day? Share below.

Fair play
Whether it’s a playhouse, she shed or teenager’s sleepout, a stencil-painted floor in Resene Clockwork Orange will elevate it from meh to wow. Find out how to create your own with these easy step by step instructions.


 Loading…


