

How to Clean Your Washing Machine
Dirt, mould, and other grimy residue can build up inside your washer over time. Learn how to clean a washing machine, including front-loading and top-loading machines, to get your laundry as clean as possible.
Your washing machine’s main job is to clean your clothes, but did you know you should clean your washing machine at least once a month? With just a few supplies you can easily clean your washing machine to keep it looking and smelling like new.
The dirt that disappears from your clothes, towels, and sheets has to go somewhere, which means grime can build up inside your washing machine over time. Without regular cleaning, the appliance might also harbour leftover detergent, hard-water deposits, and mould or mildew around the lid. This can leave a residue on laundry or cause items to emerge from the wash with a funky smell. To ensure your freshly washed clothes and linens are as clean as possible, follow these steps on how to clean a washing machine once a month. These instructions work for cleaning front-loading and top-loading washing machines, but there are a few special considerations for both types.
If your washing machine has a self-clean function, choose that cycle and follow the manufacturer's instructions to clean the inside of the machine. Otherwise, you can use this simple, three-step process to eliminate build-up in washing machine hoses and pipes and ensure your clothes stay fresh and clean.
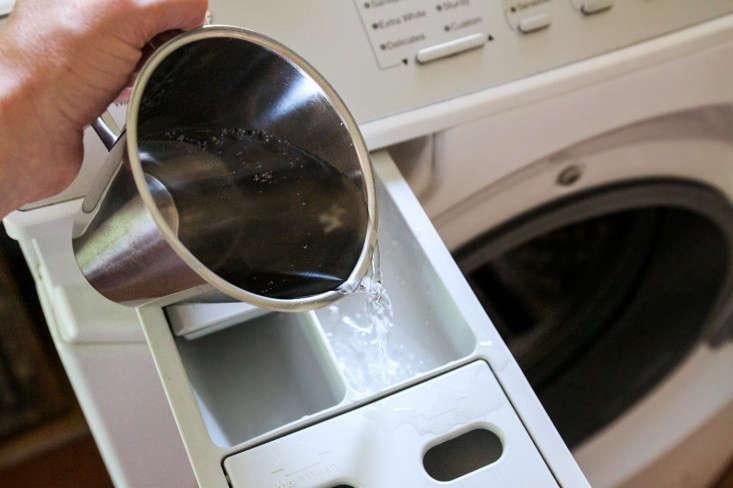
Step 1: Run a Hot Cycle with Vinegar
Run an empty, regular cycle on hot, using two cups of white vinegar instead of detergent. Add the vinegar to the detergent dispenser. (Don't worry about harming your machine, as white vinegar will not damage clothes.) The hot water-vinegar combo removes and prevents bacteria growth. Vinegar can also act as a deodorizer and cut through mildew odours.
Step 2: Scrub the Inside and Outside of the Washing Machine
In a bucket or nearby sink, mix about 1/4 cup vinegar with a quart of warm water. Use this mixture, plus a sponge and dedicated toothbrush, to clean the inside of the machine. Pay special attention to dispensers for fabric softener or soap, the inside of the door, and around the door opening. If your soap dispenser is removable, soak it in the vinegar water before scrubbing. Give the machine's exterior a wipe down, too.
Step 3: Run a Second Hot Cycle
Run one more empty, regular cycle on hot, without detergent or vinegar. If desired, add 1/2 cup baking soda to the drum to help clear away build-up loosened from the first cycle. After the cycle is complete, wipe out the inside of the drum with a microfiber cloth to remove any remaining residue.
Keep reading: www.curtainclean.co.nz...
Happy Friday y'all! Here's the last riddle of the week!
I am an instrument through which sounds are made, and yet, I am not something that can be played. What am I?
Do you think you know the answer to our daily riddle? Don't spoil it for your neighbours! Simply 'Like' this post and we'll post the answer in the comments below at 2pm.
Want to stop seeing riddles in your newsfeed?
Head here and hover on the Following button on the top right of the page (and it will show Unfollow) and then click it. If it is giving you the option to Follow, then you've successfully unfollowed the Riddles page.

Why are ghosts such bad liars?
...You can see right through them.
No, we haven't lost the plot! July 1st is International Joke Day and because laughter is good for your body, we want to get involved.
So, go on, jokers! Share your best joke below...

Plywood pegboard
Easily change the height and layout of the shelves any time as your plants grow or the items you want to showcase change with this handy pegboard finished in Resene Colorwood Whitewash.
Find out how to create your own with these easy step by step instructions.

 Loading…